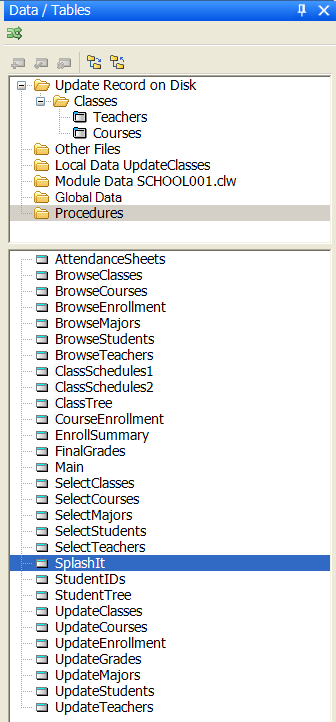
For 7.2 we’ve come up with an implementation that allows developers to safely generate their application code from everywhere except from within the Window/Report Designers and the code Editor. We had previously added restrictions that prevented code generation being initiated with partial or unsaved changes, this new implementation ensures 100% consistency for code generation, but it allows you to generate code from anywhere on the Procedure Properties dialog or the main Application window.
Clarion 7.2 – Menus
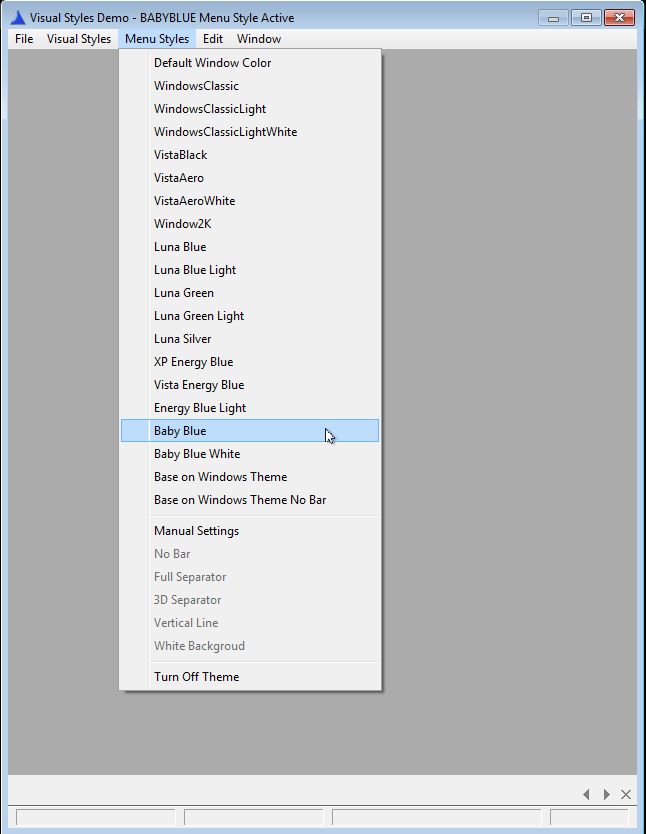
We’re getting Clarion 7.2 ready for release, and I thought I’d make a few posts and talk about the changes and new features. Version 7 already has support for creating a very nice UI on your menu’s, and we recently added a couple new menu styles and support for using a 3d vertical separator. Using the Menu Styles lets you provide the exact same UI for your menu’s across all supported operating systems. No matter what OS your application is deployed on you have complete control of the menu colors and overall style.
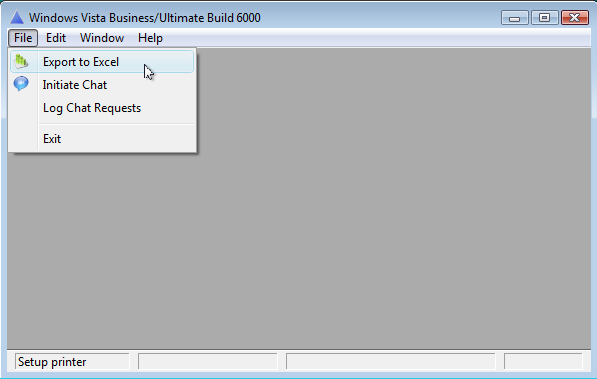
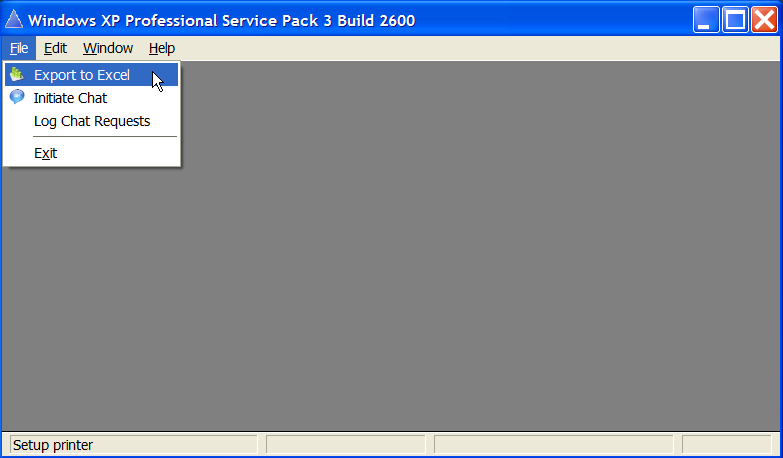
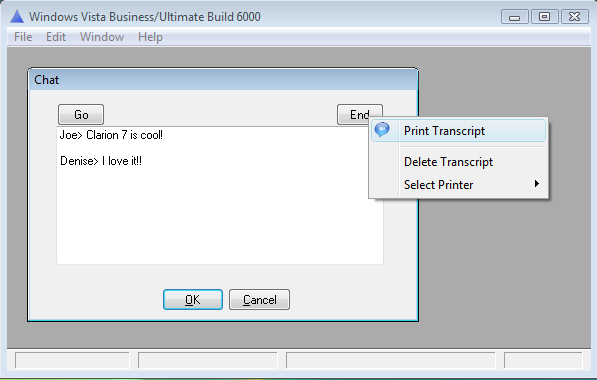
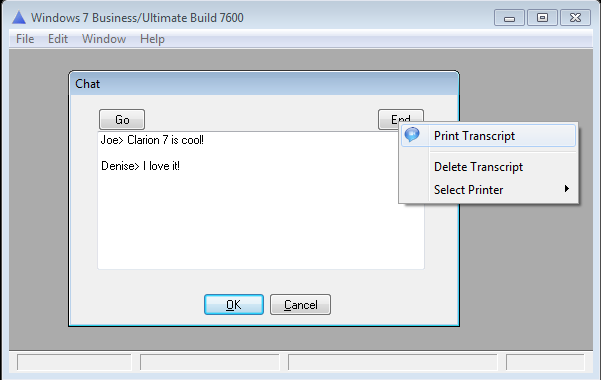
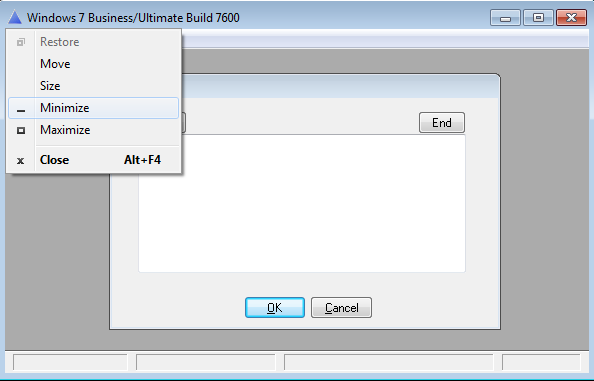
Now in 7.2 we’ll introduce new support to make your applications use the OS menu’s. The new support doesn’t use the MenuStyleManager class, its only requirement is that your App is properly manifested, and with that your menus will match the menus on the users operating system. Here are some screen shots taken from different operating systems.
and for those who prefer using the C7 MenuStyleManager class you can be sure we’ll continue to enhance it, so that you’ll have complete consistency in your menu’s across operating systems
Update for 7.1
An update for 7.1 is going out today, there are no new features introduced in this release, but there is a change (for the better) that you’ll soon have:
CHANGE: Code generation only executes from the application tree window, this prevents generation with partial or unsaved changes and ensures consistency for code generation.
What this new change boils down to is a subtle (or not so subtle, depending on your work style) change to where and when you can initiate code generation. In all previous releases the IDE was very loose about allowing you to initiate code generation from just about anywhere within the Application Generator dialogs and supporting components (Designers, Embed Editor, etc.), without consideration for the current state of uncommitted changes, and unfortunately this flexibility opened up avenues for introducing problems into the generated code. Imagine if you changed a Window or Report and exited the Designer, now the structure has changed but you haven’t committed the changes at the Procedure level, but while still on Procedure Properties you execute code generation. What should generate? Should AppGen somehow restore the old structure (probably not what you want), or auto-commit the changes to the Procedure, again not a decision that should happen without an explicit choice by the developer. The implemented solution for this is very simple, the AppGen will inform you to return to the main window, which in turn forces you to either save the partial changes or abort them. The result is 100% consistency in the generated code, at the cost of having to make an explicit decision to save or abort changes at the Procedure level. Besides this change (for the better and safer) there are a good number of other fixes. You can read the entire list here
Update for 7.1
An update for 7.1 is going out today, one of the really nice improvements is this release:
FEATURE: New option in “Tools/Options/Clarion/Clarion for Windows/General” – Use lightweight parsing mode (enabled by default). Used only if project parsing is set to “Parse all hand-coded projects and only applications opened for editing”. If this option is enabled only the PROGRAM file will be parsed on project reparsing to refresh global information for code completion. Each MEMBER file will be parsed only when a procedure located within this MEMBER file is opened for editing.
What this new feature boils down to is a very noticeable improvement in performance for parsing large applications, especially when working with embedded code. There are also several other refinements for code completion, some fixes for conversion of TXRs to the the new .REPXL format (used in the new ReportWriter), and a number of other fixes. You can read the entire list here
.Net Application Generator
In this post I’ll try to provide a complete overview and our best estimate on when you’ll have this new technology in your own hands. Diego Borojovich is leading the team working on the new .Net Application Generator (AppGen.Net), and if you have attended any DevCon events over these last years then you probably have met Diego. He’s been working with Clarion for over 16 years, and joined the SoftVelocity development team 8 years ago. You’ll be hearing a lot more from Diego in blog posts in the upcoming weeks as he talks in-depth about the new AppGen.Net, the template language, and how the new code generation/template system works.
Let’s start from the top; the Code Generation engine in AppGen.Net is completely new. It has its architectural and conceptual roots in the Clarion Win32 AppGen, and that technology is blended with the functionality found in the Text Template Transformation Toolkit (T4).
The template language used in the new AppGen.Net is a complete departure from the syntax used by the templates in our Win32 Application Generator. It uses an extended set of the T4 template directives. It’s very easy to work with the template code and templates can be used in any type of project (WinForm, WebForm, CompactForms, Web Services, etc.). And just like with our Win32 AppGen you can write templates to create any type of output that you need – CLN, CS, ASPX, HTML, SQL, XML, or anything else you need.
The syntax for the new templates is similar to what you see in an ASP.NET .ASPX source file – here’s a small snippet so that you get a feel for what it looks like:
<#@ template language=”C#” debug=”true” type=”ProcedureExtension” name = “DescriptionOutput” family = “Clarion.Linq”#>
<#@ assembly name=”mscorlib.dll” #>
<#@ assembly name=”System.dll” #>
<#@ import namespace=”System” #>
<#@ import namespace=”SoftVelocity.TextTemplating” #>
<#@ property processor=”PropertyProcessor” name=”MyDescription” type=”System.String” defaultValue=”None”#>
<#%+ CustomGlobalData priority = “1000”#>
I already mentioned that the AppGen.Net template system supports an extended set of the T4 template directives, these extended directives include equivalence for our #PROCEDURE, #CODE, #GROUP, #CONTROL, #EMBED and #AT and #EXTENSION directives as found in our Win32 template system. And you may have noticed in the first line of the template snippet where it reads “template language=C#”? In the first release, all the templates are coded in C#, but in a future release we plan to let you use any .Net language to write your own templates. The templates themselves can utilize the entire .Net Framework, including any 3rd party components, and that gives us (and you) incredible power and flexibility in the template system; meaning there are really no limits to what you can do in a template (outside of is your own imagination). If you plan on writing templates you’ll be glad to know that inside the IDE we already have T4 syntax highlighting in the editor, and in the near future we’ll be adding code completion support.
The template system has the concept of a template registry, just as we have now. But with AppGen.Net when templates are registered into the IDE they are automatically compiled into a binary assembly. Compiling the templates provides for faster code generation, immediate detection of syntax errors, and makes it easy to share templates within a team.
In the initial public release the generated data access layer will let you select from two data access frameworks; LINQ to File, and LINQ to SQL. (It’s possible that we will also provide a template set for generating a plain ADO.NET data access)
What is LINQ to FILE?
LINQ to FILE utilizes our own LINQ provider that encapsulates an ABC-styled framework — using LINQ syntax for accessing and updating data via our underlying File Driver technology. The LINQ to FILE provider maintains referential integrity and also handles auto incrementing of keys. The LINQ to File data access layer can also utilize our managed .Net IP driver. If you’re not already familiar with LINQ syntax here is a simple example of the syntax used for retrieving data:
query? = from class in ClassesQuery |
where class.RoomNumber < 10 |
select class
This LINQ query will retrieve all records where the column RoomNumber is less then 10, it’s really that simple. And using a LINQ query with a Where clause instead of filtering records in a Loop provides a noticeable increase in performance. Using the LINQ to File lets us work with powerful SQL-like query and update capabilities, working with all of our FILE Drivers, and integrated into the LINQ to FILE provider is functionality essentially equivalent to that in our existing ABC framework.
What Is LINQ to SQL?
LINQ to SQL is itself a light-weight ORM (object relational mapping) implementation that ships as part of .NET 3.5, that allows you to model a relational database using .NET classes. You can then query the database using LINQ, as well as update/insert/delete data from it. LINQ to SQL supports transactions, views, and stored procedures. The templates provide an easy way to integrate data validation and business logic rules directly into your data model.
In addition to the two LINQ frameworks we plan to add template support for working with several additional technologies for the data access layer; options for data access will look like this:
• LINQtoFile
• LINQtoSQL
• ASP.NET MVC
• NHibernate
• CSLA
• ADO.Net
We also plan to have templates for supporting these technologies:
• Windows Communication Foundation (WCF) is the .Net programming model for building service-oriented applications.
• Web Services (for exchanging data)
And I should mention that we’re providing template sets to support the three target platforms; Winforms (desktop), WebForms (Web) and Compact Forms (Mobile devices). The templates being developed for .Net offer code generation in 2 language flavors C# and Clarion#, and eventually we’ll add VB to the list.
I want to mention a few things about the user interface generated by the templates. These are options that the templates will provide for the user interface layer:
• Winforms (using the standard .Net Framework controls, or a designated 3rd party component set)
• CompactForms (using the standard .Net Framework controls, or a designated 3rd party component set)
• Webforms (using the standard .Net Framework controls, designated 3rd party component set, Ajax Library, and in the future Silverlight)
• WPF – Windows Presentation Foundation: (using the standard .Net Framework controls, or a designated 3rd party component set)
(The WPF support will come after the initial release, and although we don’t presently have a full-blown designer, we will have UI edit capabilities, and of course you can use many different external tools to create and work on the UI as the code is completely separate from the other layers)
For creation of the UI the templates read the control settings from the Dictionary, just as we do now in the Win32 AppGen, but we plan to provide (as a configuration option) the ability to specify that the templates use an external file for control mappings, and in this file we’ll store the fully-qualified name of the control, along with its properties (i.e. font, width, height, etc.). The controls specified in the config file will map back to the controls supported in the templates for generating the UI. This feature means that you can specify the use of 3rd party components and the Template Wizards will generate the UI using those controls and properties.
Here are a few miscellaneous new features that are worthy of mention which are planned to be introduced with the new AppGen.Net:
• Option to generate test cases (nUnit) for aspects of the APP
• Ability to attach developer documentation/working notes directly into the .APP and/or to individual procedures
And something else exciting is coming up; we are happy to announce that the templates to power these technologies will be made part of an open collaborative community project so that anyone interested can participate in their ongoing development. This collaborative project will contain all of the new Clarion templates and sample Apps.
And this project is not just for the new .Net templates, we’ll be adding all of our Clarion templates (Win32 and .Net), as well as new example Apps. With this project the Clarion community will always have access to the very latest updates, as well as contribute patches, and add new templates and sample Apps.
Now the question at hand is when will you get it? We have had to revise our earlier estimates to allow extra time for some of the integration tasks in our switch over to the new AppGen.Net, and the revised estimate for delivering a full beta is now about 5-6 weeks from today, putting it into a late-May early-June time frame. However, it is very likely that we’ll release the new AppGen.Net with some reduced template support before that. That first early release will support generation of code targeted at the data access layer, in other words it will be without the tie-in with the Designers. And that release also will likely include Application and Procedure Wizard functionality. So that first release will provide a big increase in productivity in two areas, and it’ll also allow those who are interested, to start working on the template code itself. Very importantly it’ll also let us get feedback from you on the AppGen.Net UI itself, which is very valuable to us all.
XML with Clarion 7 – Part 2
For this article we’ll dive further into the processing of XML files. There are two types of XML we may encounter, #1 well formed XML, #2 unknown XML files.
#1 (well formed XML) documents are XML files that are correct in their syntax and will not require any validation, for this type of file we know from where they come from, and we know their format.
#2 (unknown XML) are documents that we don’t know where they come from, or if they are syntactically correct and well formed.
For the second type we won’t worry about because in this article we will be talking about how to read well formed files, the type of files that are created by an automated process to communicate between programs and share information, all that is done using well formed, well known XML documents.
When we want to communicate with another program through an XML document we need to be able to write that document and to read that document.
In this type of exchange the XML format used in that document is a well known format.
We already saw how to write our XML document using the XMLGenerator class which creates a well formed document, and now we need to Read a “received” document.
The Reading.
For reading an XML document a new class was recently added in C7; that class is the XMLParser. The XMLParser is a class that reads an XML document file and processes it, the document must be a valid document because the XMLParser does not validate the document, that is why we call the XMLParser a non-validating XML parser.
Is a no-validating parser bad?
Well no, it is not bad, it is just that, a non-validating parser.
Because we will be reading a known file we don’t need to validate the files and we don’t need to loose any time in doing that.
We are not creating a program that can read any random XML file, we only need to read a specific XML document.
For that kind of file we don’t need any validation, we know the format and it is what we are expecting.
The XMLParser included in C7 is very fast and its memory usage is very low. The parser does not store or create any structure with the XML data, instead it uses an interface and calls each method of that interface passing the XML Data.
To use the parser the IXmlNotify interface needs to be implemented.
The IXmlNotify is an interface declared in the file QuickXMLParser.INC, the same file where the XMLParser is declared.
The question is then:
Why I need to implement the IXmlNotify to parse my XML file?
The XMLParser does all the work of parsing the file but it does not know what to do with the data that comes from the XML Document.
We need to “tell” the parser what to do with the data. Or in this case the parser will just inform us that it found some data and let us decide what to do with it.
So the parser just reads the data and passes it to us.
How is the data is passed to us?
The parser calls the correct methods from the IXmlNotify interface based on the data that it reads.
A quick look into the IXmlNotify interface will show that the methods are very simple.
IXmlNotify INTERFACE
FoundNode PROCEDURE( STRING name, STRING attributes )
FoundElement PROCEDURE( STRING name, STRING value, STRING attributes )
CloseElement PROCEDURE( STRING name)
StartElement PROCEDURE( STRING name, STRING value, STRING attributes )
EndElement PROCEDURE( STRING name, STRING value, STRING attributes )
FoundComment PROCEDURE( STRING Comment)
FoundHeader PROCEDURE( STRING attributes)
CloseHeader PROCEDURE()
FoundAttribute PROCEDURE( STRING tagname, STRING name, STRING value )
END
Not that many methods to implement, right?
It is easy to implement the IXmlNotify, just declare a class like this:
MyClass CLASS,IMPLEMENTS(IXmlNotify)
END
And implement the IXmlNotify methods like:
MyClass.IXmlNotify.FoundNode PROCEDURE( STRING name, STRING attributes )
CODE
In each of the methods you implement you just write the code that is needed every time the parser finds some data that you are interested in.
Remember that this is not a general purpose parser so you will know exactly the data that you will be receiving.
After you have you class implemented just call the parser like:
lXMLParser XMLParser
LOC:XMLStream STRING(1024)
CODE
lXMLParser.Parse(LOC:XMLStream,MyClass.IXmlNotify)
Note: you can declare your string on run time based on the size of the XML file or you can receive the stream from a web server,etc.
Most of the time you will have to parse a FILE, and that is why we extended the parser class to support a FILE name.
You still need to tell the Parser what to do with the data that it is parsing, but now instead of implementing the IXmlNotify interface you just derive the VIRTUAL methods needed.
And after that you just call your class like this:
XML.Parse(fileName)
Only one method call and the XML Document was parsed and the data was processed as you indicated.
With the Virtual methods you only derive the methods that are called with the data you are interested in, so you don’t need to derive all the methods.
The following are the all the methods that are virtuals
XmlNotifyFoundNode PROCEDURE(STRING name, STRING attributes),VIRTUAL
XmlNotifyCloseNode PROCEDURE(STRING name),VIRTUAL
XmlNotifyFoundElement PROCEDURE(STRING name, STRING value, STRING attributes),VIRTUAL
XmlNotifyCloseElement PROCEDURE(STRING name),VIRTUAL
XmlNotifyStartElement PROCEDURE(STRING name, STRING value, STRING attributes),VIRTUAL
XmlNotifyEndElement PROCEDURE(STRING name, STRING value, STRING attributes),VIRTUAL
XmlNotifyFoundComment PROCEDURE(STRING Comment),VIRTUAL
XmlNotifyFoundHeader PROCEDURE(STRING attributes),VIRTUAL
XmlNotifyCloseHeader PROCEDURE(),VIRTUAL
XmlNotifyFoundAttribute PROCEDURE(STRING tagname, STRING name, STRING value),VIRTUAL
As you can see each one match a method in the IXmlNotify.
Summarizing both articles, an XML file is just a formatted text file, we can read the data contained by hand using a simple ASCII FILE but then we need to parse the file to extract the content, to make that process much easier we use the XMLFileParser class. To create a new XML file instead of just writing out the text we use the XMLGenerator class to simplify the process of creating the Tags and maintain the open/close of notation tags, also it ensures that we create a well formed XML document, and gives us the flexibility to create any type of XML document that we need in our program.
Attached is an example on how to create a class that derives the methods to load a tree with the parsed document.
Template Tips #3 – #ATEND vs #AT(%AfterGeneratedApplication)
It looks like the embed %AfterGeneratedApplication is a very popular embed these days.
We already talked about it in the Template Tips #2 post where we compare it with the #AT(%ProgramEnd). Now we’ll compare #AT(%AfterGeneratedApplication) with #ATEND, and we’ll explain which of these is appropriate for a given task.
Why do we compare #ATEND with #AT(%AfterGeneratedApplication) ?
Because both of these are executed at the end of the code generation process (when we click on the Generate button).
Some 3rd Party Templates have the need to execute code that requires the App to be have been generated, and you’ll find they make use of #ATEND or #AT(%AfterGeneratedApplication).
All of the templates support #ATEND, but we’ll focus on the #APPLICATION #ATEND embed.
The #ATEND is comparable to a Destructor of a class, it is executed at the end of a templates code generation cycle, and the purpose is typically to execute some clean up code. When I mention clean up code I’m not talking about generating backups, creating extra files, or doing some extra processing, etc. I’m talking about cleaning up template symbol values. Any other processing should not be executed in the #ATEND.
One of the reasons additional processing should not be executed in the #ATEND is that the #ATEND is similar to a Class Destructor, and that means the scope of the template is already ending, so just like in any other Class Destructor. you should not be creating new instances of anything at that point.
Another reason, that is more related to the templates is the Embeditor. What does the Embeditor have to do with the #APPLICATION #ATEND?
Well if you inspect the #APPLICATION code closely you will see that there is one magic part that make the Embeditor work.
I’m talking about this code:
#IF (%EditProcedure) #! Special for editing embedded source in context #CREATE(%EditFilename) #FIND(%ModuleProcedure,%EditProcedure) #FIX(%Procedure,%ModuleProcedure) #! Fix current procedure #MESSAGE('Generating Module: ' & %Module,1) #! Post generation message #MESSAGE('Generating Procedure: ' & %Procedure,2) #! Post generation message #GENERATE(%Procedure) #! Generate procedure code #COMMENT(60) #!Set comment alignment to column 60 #CLOSE #ABORT #!Stop execution of any other code #ENDIF
Yes, the Embeditor code is just the #GENERATION of the procedure with a little bit of magic.
Because this code is executed in the #APPLICATION section of the template we are expecting the #APPLICATION #ATEND to be executed.
Actually everything would be executed if it was not for the #ABORT at the end of the above code.
So if you are using the #ATEND, you are not only adding code to the equivalence of a Class Destructor, but you are also adding code that will always be executed unless you check for the value of the %EditFilename symbol. If the value of %EditFilename is null then you can be sure that you are in regular code generation, and not in the Embeditor generation. This is a very important point.
Where does the #AT(%AfterGeneratedApplication) fit into all this code generation?
Well the #EMBED(%AfterGeneratedApplication) is located at the end of the #APPLICATION template, it’s the last code to be generated before the #ATEND, but the big difference is that it only executes when we are generating the #APPLICATION during regular code generation. The execution of that embed will not happen on the Embeditor generation because of the #ABORT that we already mentioned.
The conclusion, if you need to execute code at the end of the Application generation process, I always recommend the use of the #AT(%AfterGeneratedApplication) instead of the #ATEND. And always try to use a PRIORITY, that will make other templates play nice with yours.
XML with Clarion 7
As with any other file format there are two basic processes that can be done with XML files; Reading and Writing.
C7 supports doing both in many ways, without the need of any additional tools.
In this article we’ll focus on two different methods, one for writing and one for reading.
The writing.
The method discussed for writing is not new to C7 but it was never used in this way.
I’m talking about the XMLGenerator class, the same class as used in the Report Output templates.
Most of the classes used in the Report Output were designed to be used independent of the Report itself.
The XMLGenerator is no exception, and that is why it can be used in a very simple way to create XML files by hand coding the calls to the XMLGenerator methods.
The class has methods to create an in memory XML document and once that is done we can flush the
content to a file.
The methods are self-documented in the functionality, but lets introduce some code.
INCLUDE('ABPRXML.INC'),ONCE
XML XMLGenerator
CODE XML.Init('breakfast_menu.XML') XML.OpenDocument() XML.SetEncoding('ISO-8859-1') XML.SetRootTag('breakfast_menu') XML.AddComment('The root tag is the first tag in the doc') XML.AddTag('food','') XML.AddAttribute('recordNumber','1','food') XML.CloseDocument()
First, as with any class contained within a separate module we need to include the module.
the class is declared in ABPRXML.INC
After that we create a new class instance of type XMLGenerator that we conveniently call XML
After that we call the Init method passing the xml file name we want to create.
XML.Init(‘breakfast_menu.XML’)
Then we open the document calling the OpenDocument()
And start to create the document content.
XML.OpenDocument()
The class supports many formats for its XML. In this case we use a single root node
that we set by calling the SetRootTag method.
XML.SetRootTag(‘breakfast_menu’)
After that we need to start adding nodes to our tree.
XML.AddTag(‘food’,”)
The Tags can have both attributes and content.
In this case we add attributes to the last added Tag named ‘food’ with the AddAttribute method.
XML.AddAttribute(‘recordNumber’,’1′,’food’)
After adding all our Tags and Attributes we just need to close the document and the content will be written to disk.
XML.CloseDocument()
Some of the methods used to add content are:
SetRootTag PROCEDURE(STRING pRootTag)
AddComment PROCEDURE(STRING pComment)
AddTag PROCEDURE(STRING pName,STRING pValue,BYTE pIsCData=0,<STRING pParent>)
SetTagValue PROCEDURE(STRING pTagName,STRING pValue,BYTE pIsCData=0)
AddAttribute PROCEDURE(STRING pName,STRING pValue,STRING pTagName)
Some of the methods to modify properties of the XML document are:
AddXMLHeaderAttribute PROCEDURE(STRING pName,STRING pValue)
SetEncoding PROCEDURE(STRING pEncoding)
SetXSL PROCEDURE(STRING pXSLFileName)
SetUseCRLF PROCEDURE(BYTE pTrue=1)
As you can see, you can create any type of XML document, writing just a little code.
You don’t have to worry about the formatting or strings or opening closing Tags, or anything, just call
the methods and the class will create the document for you.
Just remember that the physical file does not exist until you close the document.
Attached in this document is the full example to generate the XML file.
In the next Part 2 of this article we will be discussing about reading this document using Clarion 7
NOTE: This class is part of the Report output Generator to XML and is included in C7 EE package and can be added to C7 PE
Project Options and fixing Errors in Embedded Source
This article reviews the essentials of the project system of Clarion 7, how it interacts with the application generator’s embed points, and the options that you have available to control or change the default behavior of the IDE.
Understanding these options will make you more efficient and productive in the Clarion 7 IDE.
We’ll start with an overview of the project system, discuss the origins of generated source code, and finish with the options available that control how you can edit errors in embeds when needed.
Controlling Source Generation
Regarding the action of building a program created with a Clarion application file, Clarion 7 is the most flexible IDE in the product’s history.
You can just generate source, generate source and make (build), and generate source, make (build), and then run the compiled program from the IDE.
Make (or Build) refers to the process of compiling and linking source to your output project target (EXE, DLL or LIB)
You can perform these actions from the Applications Pad, or from the IDE toolbar:
The highlighted IDE toolbar buttons shown in the above image are only enabled when an Application is opened for editing.
By comparison, the Applications Pad can affects all applications contained in the current Solution. How you process the Generate, Generate and Build, and Generate Build and Run button is controlled from the button drop list options:
Setting the Applications Pad to Generate Edited will perform the same actions as the buttons on the IDE toolbar.
And here is another important tip:
All buttons on the IDE toolbar and Applications Pad that display a “lightning bolt” will always affect the source generation of applications.
The following buttons (Build and Rebuild):
…do NOT cause the source code generation; these buttons only run a “Build” against the source modules that already exists on disk.
The same fact; “Build does not cause the Application Generator to generate code” applies to all Build options selected from the Solution Explorer:
When bad things happen to good developers – Coding Errors
Let’s face it, stuff happens. The “stuff” that I’m referring to is errors in the source code that are generated from two basic sources of any application.
Code that is generated by the templates
We can break this down a little further. Since templates are read when loading an application, it is possible that something in your dictionary could cause bad code to be generated. Primarily this is from two areas of the dictionary; Triggers and Initial Values. A good tip here is to “mark” your code in the dictionary with a comment, like “DCT generated” or something like that.
You can also cause errors in the generated code by entering incorrect values in template prompts in the Application. Examples of this can be a bad Record Filter expression, incorrect or undefined variable names, etc. In most cases, when a template prompt is looking for data, you will be prompted by one of several selection dialogs (Select a File, Select a Key, Select a Column, etc.)
Code that is generated from embeds
Embeds allow developers to modify or extend the functionality of the base templates by adding additional source code. Clarion provides two views of embeds.
The Embed Editor is located in every procedure’s Embed tab. There is a hierarchical tree of entry points, and by default these embed points open a stand-alone editor that only applies to that selected embed point.
Embeditor (Source Context Editor)
The second view of embeds is the context view. In other words, how does your embed code fit in the context of the template generated code and other embed points? This is also called the Source Embeditor.
You can access the Source Embeditor in several ways:
Right-click on any procedure in the Application tree, and select Source from the popup menu, or press the Source Embeditor toolbar button as shown below:
From the Embeds tab:
…and if you’ve never seen it before, here is the Source Embeditor:
Putting it all Together
With what was just discussed above, let’s now put it all together.
When you press one of the options that generates source from the Application Generator…
…and the compiler detects errors, what source editor will be launched from the Errors Pad?
The options to control what source editor will open is controlled by settings in the Application Options.
To open the Application Options dialog, the application editor must be closed. Find this dialog and open it from the IDE Tools Menu (Tools > Application Options).
There are three settings in the Applications Options that control your editor options.
In the Application tab (the first tab you see when the Application Options is opened), find the following option:
When working in the application editor, this option should always be OFF if you want items from the Errors Pad to open up in your favorite embed editor.
With this option turned ON, ALL errors will always open the generated CLW source file, and if you edit errors and then later regenerate source from the Application Generator, your changes will be lost. Only use this option if you are simply testing or prototyping a coding scenario.
The next two options are found in the Application Options Embed Editor tab:
The Edit errors in context (using Embeditor) option will open the Source Embeditor by default from the Errors Pad when this option is checked. When unchecked, clicking on errors in the Errors Pad will open the Embed Editor by default.
Here is a VERY important point:
The Source Embeditor (or embed editor) will open ONLY if the error in the Errors Pad is caused by an EMBED error.
If the error is caused by bad dictionary information (like triggers or initial values), bad template entries, OR an embed that CAUSES bad GENERATED code (like a misplaced END statement), the error pad will ALWAYS open the CLW instead. So in nearly all cases except for the last one, when clicking on an error results in opening the CLW, you can be certain that the error is caused by an incorrect template setting or an error introduced in the Dictionary.
The last option, Edit source embeds in context by default (Using Embeditor), does not affect how errors are processed, but instead controls what editor to use when opening an embed in the Embed Tree found in the Embeds tab.
Summary
When it comes to handling coding errors in an efficient and productive manner, you need to know your project generation options in the Clarion 7 IDE, and know that errors can occur from two different application sources (templates or embeds), and ONLY errors from embed points will open the embed editor of your choice. The embed editor that you open (Embed Editor or Source Embeditor) is controlled by settings found in the Application Options window.
We recommend that you set the Edit embedded source errors in generated code option to OFF (unchecked) and the Edit errors in context (using Embeditor) to ON (checked). These are the default settings of a newly installed Clarion 7 IDE.
Happy programming!
Template Tips #2
We found that some 3rd party templates that use #EXPORT or some other output are generating text in the middle of the generation of the APP itself. This can be very dangerous as it can “break” the code generation for the current module, leaving the user of that template with a partially generated file, or no file generated at all.
We also found some templates are sometimes using the wrong embeds to call its functionality, and that can create a problem when the template fails for any error.
The side efect of both of these template coding errors are code generation errors in the application generated source. So for templates developers we strongly encourage you to check the embeds you use and the location to ensure you are not generating code that can fail in the middle of the application generation process.
One of the changes needed by some 3rd party templates is the use of the embed:
#AT(%ProgramEnd)
this MUST be changed to:
#AT(%AfterGeneratedApplication)
The %AfterGeneratedApplication embed should be used for any side processing and code generation that is not related to the
main code generation of the APP.
We recommend that if you have a 3rd party tool that does some extra processing with the APP to take a look at the code yourself or send a query to the developer of that tool and ask them to ensure their template is not doing any processing in the wrong embed (#AT(%ProgramEnd).